

Step-by-Step Guide for Uploading Diagnostic Images
Getting Started
Step 1: Click Mark in Progress. Once the Mark in Progress is clicked, the Record Available section will open and allow for Diagnostic Imaging uploads.
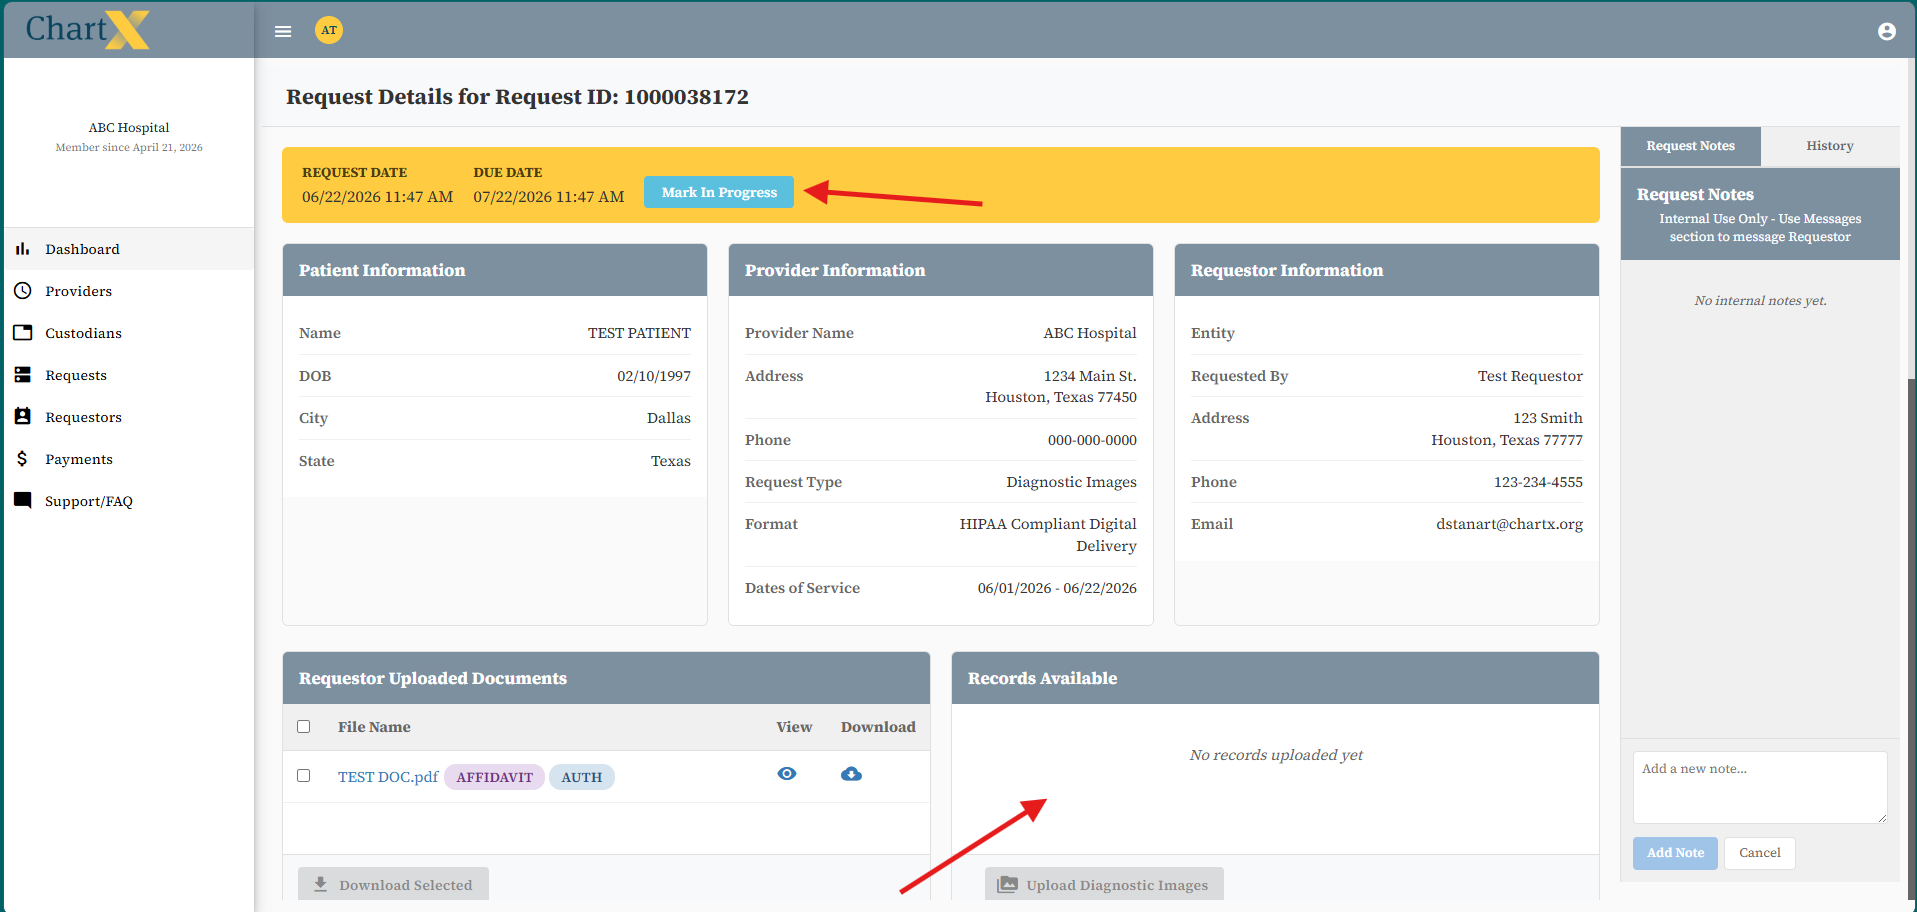
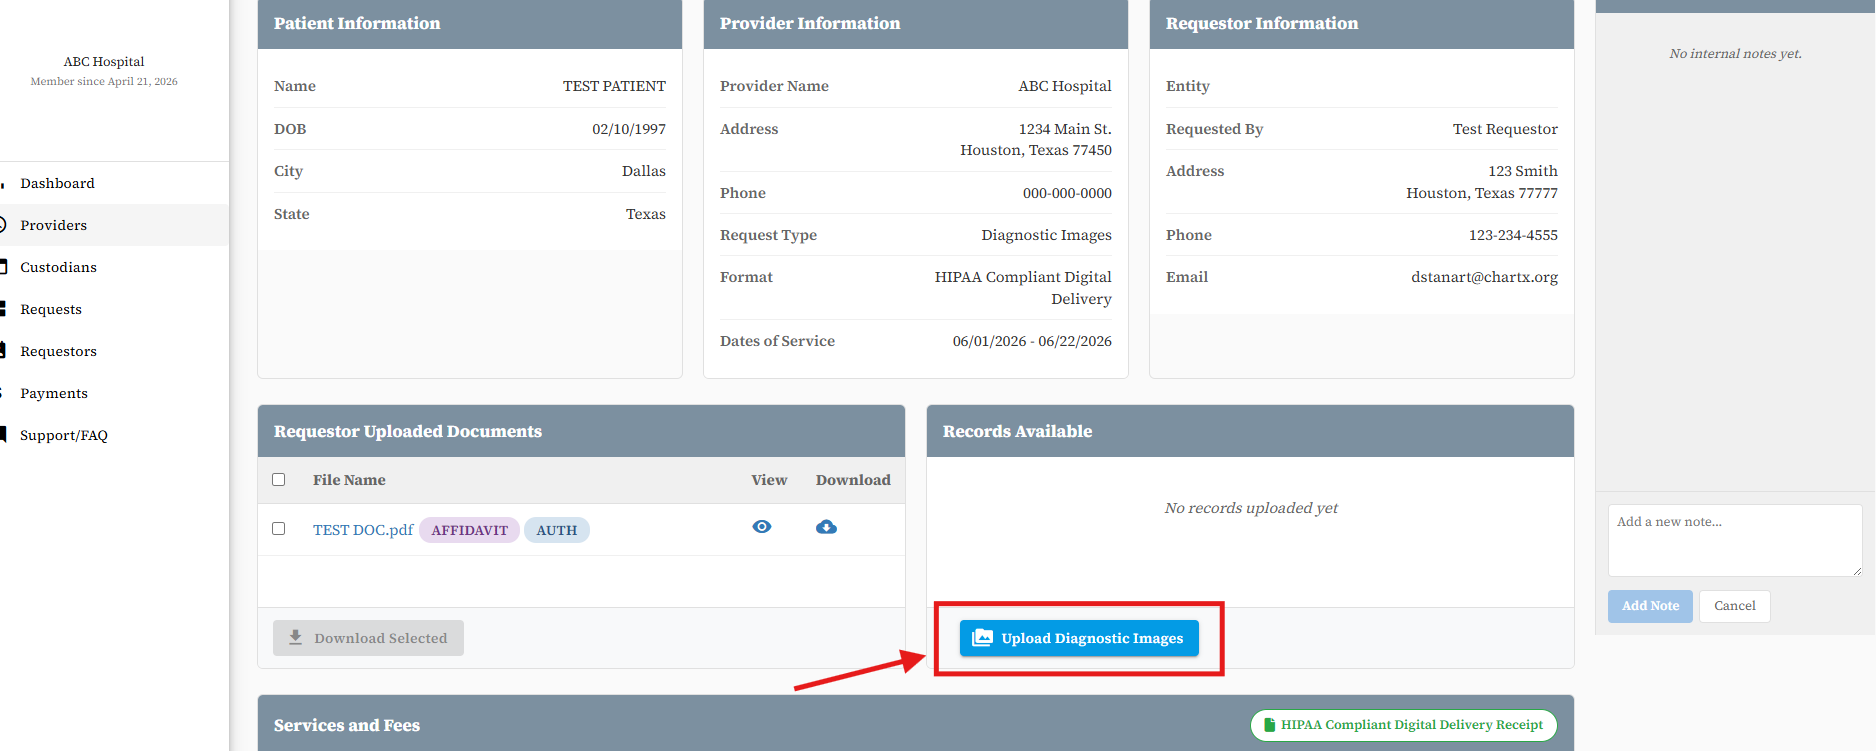
Step 2: Click Upload Diagnostic Images.
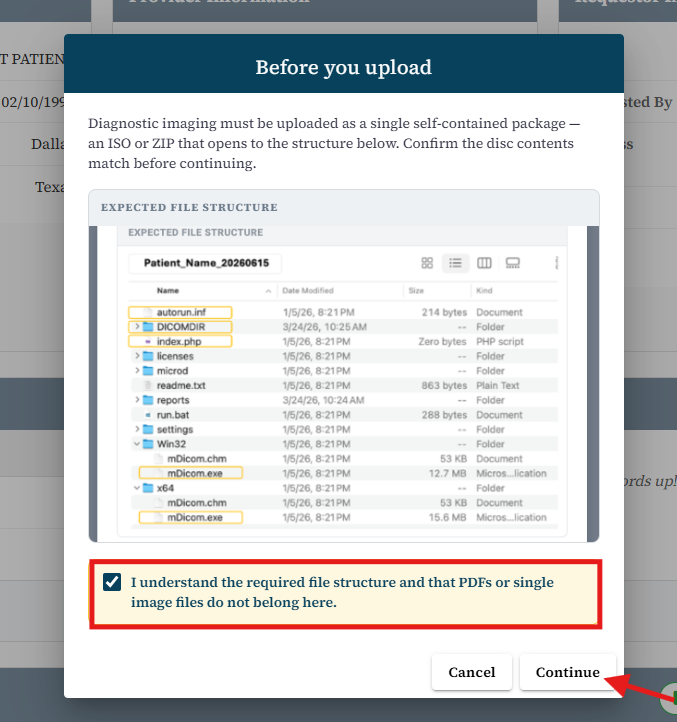
A pop up will appear asking you to acknowledge that your file must be in the correct format. Click the acknowledgement checkbox and then click Continue.
Step 3: Click Select Folder or drag and drop folder containing Diagnostic Images here.
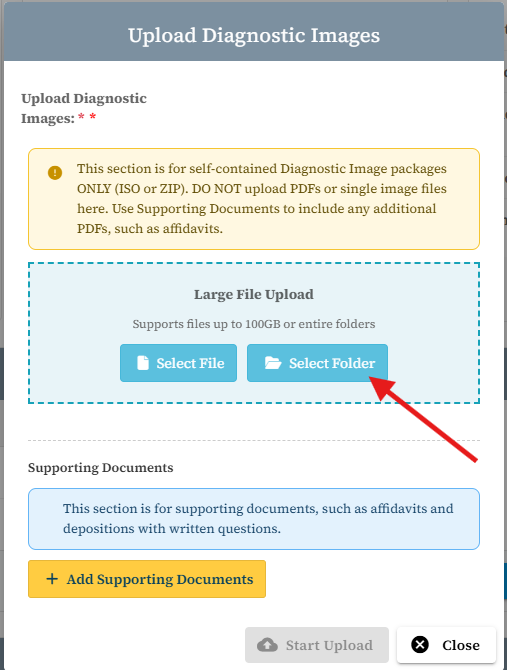
Step 4: Upload supporting documents (ex: affidavit) by clicking on the Add Supporting Document. Once Diagnostic Images and any supporting documents are added, click Start Upload.
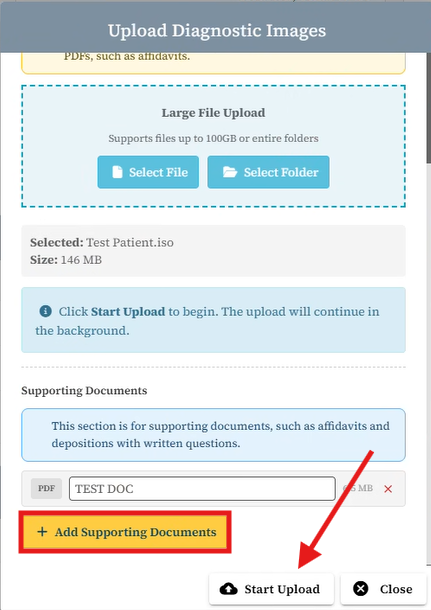
Step 5: Wait for Diagnostic Images to upload. This may take a few minutes depending on the size of the folder being uploaded.
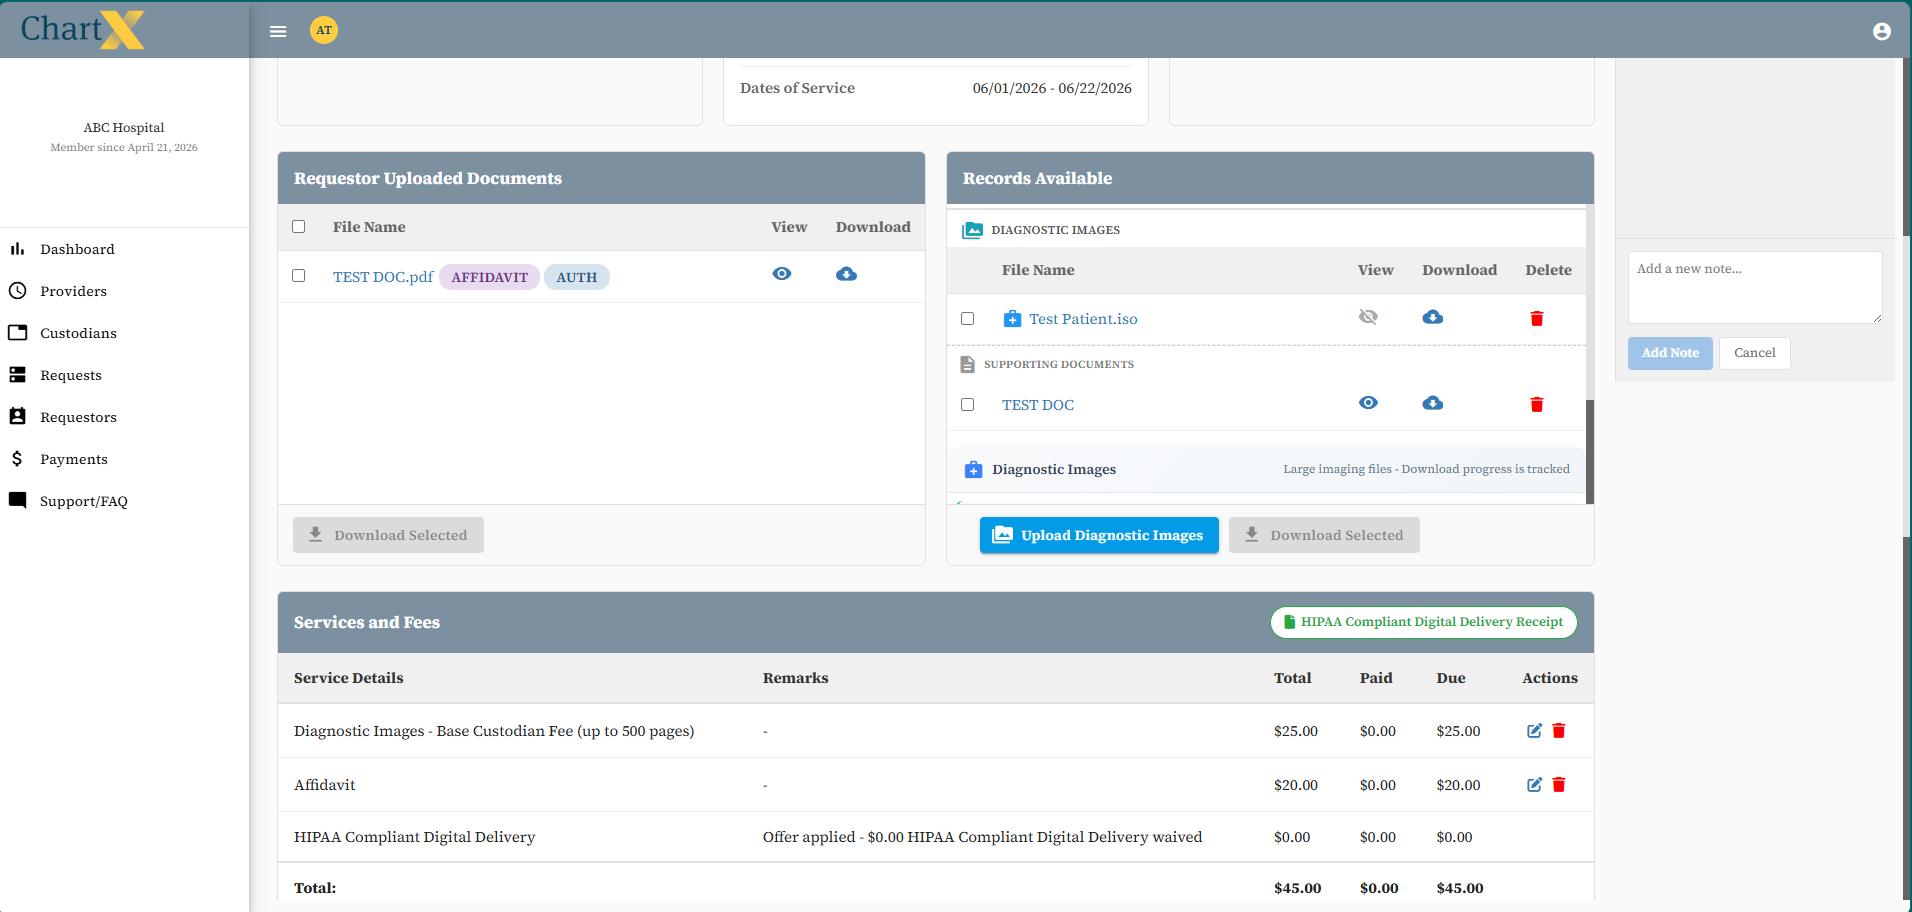
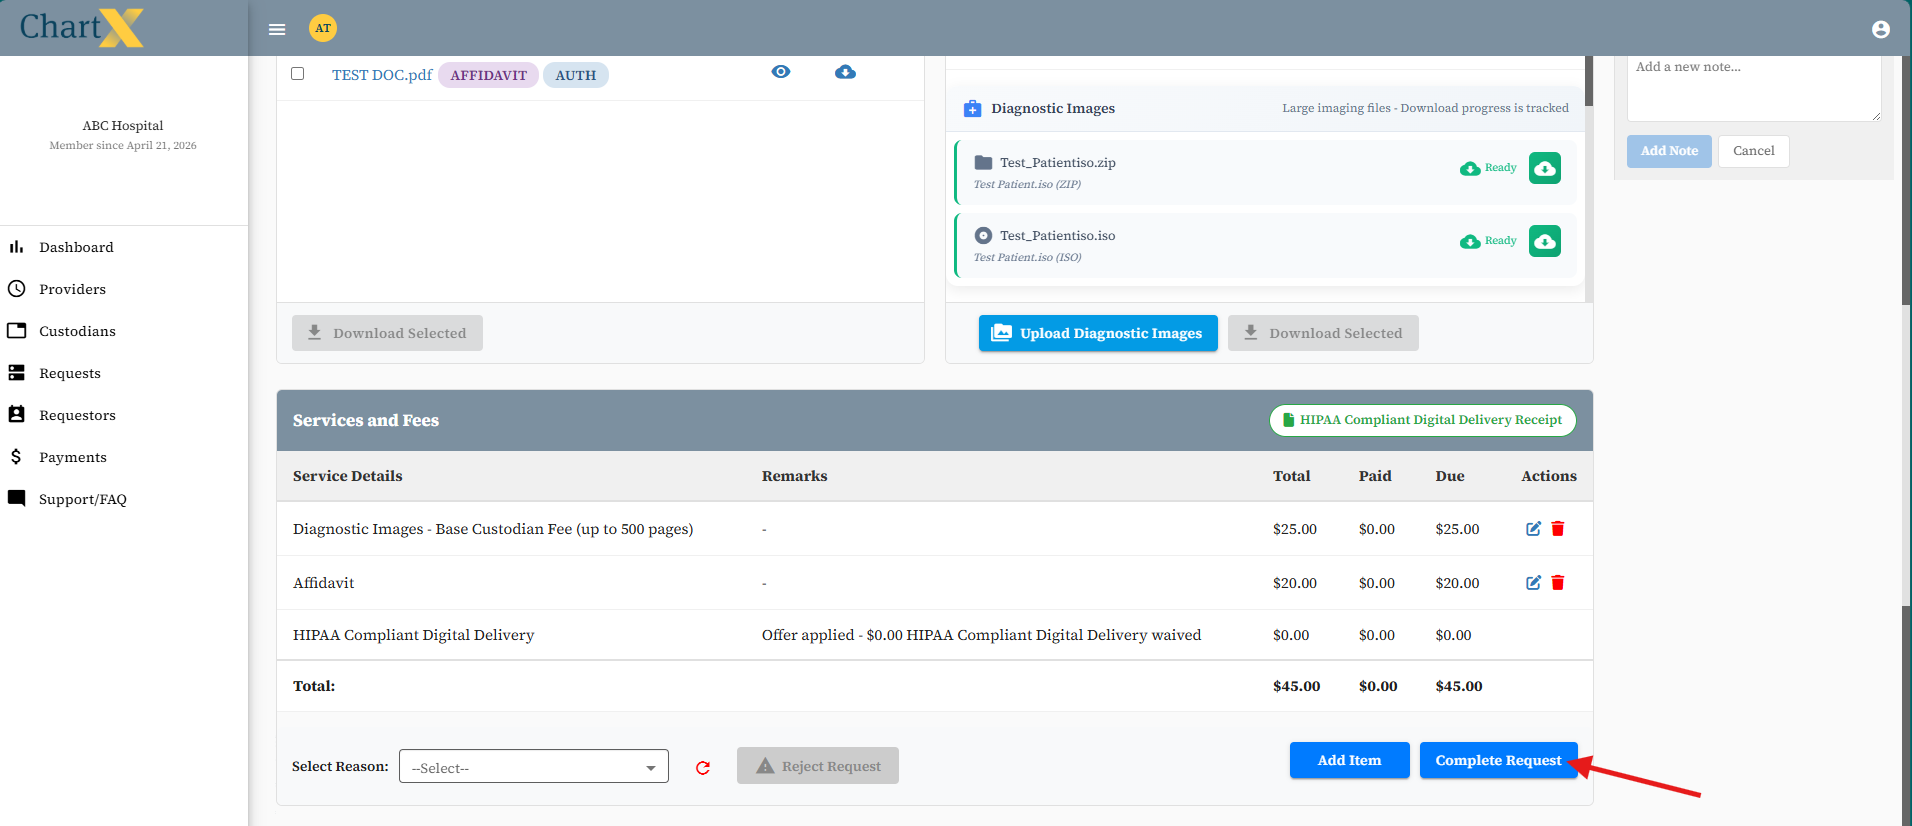
Step 6: To complete request, edit fees and click Complete Request.